Filming piano lessons is an increasingly popular way for musicians and educators to share knowledge, showcase skills, and grow an online presence. Whether you’re uploading to YouTube, teaching virtually, or building a digital music course, audio-visual quality plays a critical role in student engagement and professionalism. A common question arises when starting: Should I use a condenser microphone or dynamic microphone for filming piano lessons?
Let’s explore the best microphone options, camera angles, lighting techniques, and budget-friendly solutions to help you create polished and effective piano lesson videos—starting with the most important factor: audio.
Should I Use a Condenser or Dynamic Mic for Filming Piano Lessons?
- For piano recordings—especially in controlled indoor environments—condenser microphones are generally preferred over dynamic mics. When comparing a condenser microphone vs dynamic microphone, the former is more sensitive and can capture the wide frequency range and nuance of the piano, including dynamic variations and subtle pedal sounds.
Dynamic microphones, while more rugged and better for live performances or louder sound sources, don’t offer the same level of detail or clarity, making them less suitable for piano unless you're in a very noisy environment and need focused sound capture.
Choosing the Right Microphone for Piano Recording
When selecting a microphone, consider clarity, noise rejection, and your recording environment. For most creators filming piano tutorials at home or in a studio, a USB condenser mic offers ease of use and high-quality sound without needing an audio interface.
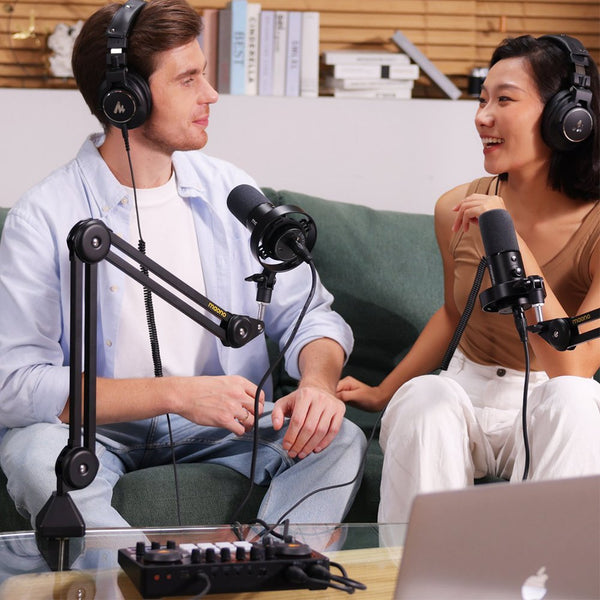
Recommended Mic: Maono PM500 or PM320
Maono offers affordable yet professional-quality condenser microphones:

A cardioid condenser microphone with XLR output and a flat frequency response—perfect for studio piano recording. It captures the richness and depth of acoustic piano tones with precision and clarity. This is a solid choice if you're looking for a professional condenser microphone without breaking the bank.

A USB-powered professional microphone condenser with plug-and-play functionality. Ideal for creators who want a simple, high-quality setup for lesson filming or live-streamed performances.
Both models come with shock mounts and pop filters, helping reduce noise and improve clarity.
Best Camera Angles for Piano Tutorials
Great camera placement enhances learning by giving viewers the right visual context. Here are three effective angles:
-
Overhead Shot (Top-Down)
-
Ideal for showing both hands and keys.
-
Requires a boom arm or tripod rig above the piano.
-
Best for instructional clarity, especially for beginners.
-
Side Angle (Profile View)
-
Captures finger technique and posture.
-
Offers more personality and performance flair.
-
Diagonal Front Angle
-
A hybrid of overhead and profile views.
-
Good for YouTube intros or less formal tutorials
Bonus Tip:
Use multiple camera angles if possible—one overhead and one side view. This can be done using smartphones or webcams, and edited together for a professional feel.
Essential Lighting Techniques for Filming Piano Lessons
Good lighting improves video clarity and creates a warm, engaging atmosphere. Here’s how to get it right:
1. Use Soft, Diffused Lighting
Avoid harsh shadows by using softbox lights or LED panels with diffusion covers. Position them at 45-degree angles on each side of your piano to evenly light the area.
2. Leverage Natural Light (When Possible)
If filming during the day, position your piano near a window. Use sheer curtains to diffuse direct sunlight and reduce glare on glossy piano surfaces.
3. Avoid Overhead Lighting Alone
Ceiling lights cast harsh shadows on hands and keys. Supplement with directional lighting focused on the keyboard and your upper body.
4. Ring Lights for Face Visibility
If you’re speaking to the camera or introducing segments, use a ring light in front of your face to ensure clear, flattering lighting.
Microphone Setup Tips for Clear Piano Audio
Even with a great mic, poor placement can ruin the sound. Follow these guidelines:
Mic Placement:
-
For upright pianos: Place the mic slightly above and behind the top panel, facing the strings.
-
For grand pianos: Position the mic inside the piano lid, roughly 8–12 inches above the strings, avoiding direct airflow.
Angle and Distance:
-
Keep the mic 6–12 inches from the sound source.
-
Angle it slightly off-center to reduce pedal thumps and avoid wind bursts.
Gain and Volume:
-
Set the gain low to avoid clipping.
-
Do a test recording and adjust levels in your DAW or recording app.
How to Film Piano Lessons on a Budget
Professional-looking piano videos don’t require a Hollywood budget. Here's how to keep it affordable:
Microphone:
-
Use a USB recommended condenser microphone like the Maono A04 for under $70.
-
Lavalier mics (wired or wireless) can work well for voice narration.
Camera:
-
Use your smartphone camera, especially newer iPhones or Androids. They can record in 1080p or even 4K.
-
Add a basic tripod or desk mount for steady shots.
Lighting:
-
Affordable LED lights like Neewer or UBeesize kits work well.
-
Use white reflectors (even white poster boards) to bounce light.
Software:
-
Free video editors: DaVinci Resolve, iMovie, CapCut.
-
Free audio tools: Audacity for cleaning and adjusting sound.
FAQ Section
1. What’s the best camera angle to show both my hands and the keys clearly?
A top-down overhead angle is best for showing hand positioning, fingering, and keyboard layout clearly.
2. Should I use one or two cameras to film my piano lesson?
One camera is enough, but using two (overhead + side view) adds depth and professionalism to your videos.
3. Can I use a webcam or smartphone to film high-quality piano lessons?
Yes! Many webcams and smartphones can record in full HD or 4K. Use manual focus and stable mounts for best results.
4. Where should the camera be positioned for beginner piano tutorials?
Position it overhead for hand and keyboard visibility, or slightly diagonal if you want to appear in the frame.
5. Where should I place the microphone for the best piano sound?
Place it near the strings or soundboard, avoiding direct airflow from keys or breath noise.
6. How do I reduce background noise in my piano recordings?
Record in a quiet room, turn off fans/AC, and use a cardioid condenser microphone with a low-noise floor. Apply noise reduction in post-processing.
7. What’s the best lighting setup for indoor piano filming?
Use softboxes or LED panels angled at 45 degrees to avoid glare. Combine with natural light if possible.
8. How do I sync audio and video when filming with a separate mic?
Use a clap at the start of recording. Align the audio spike with the video in your editor. Apps like Adobe Premiere or DaVinci Resolve support easy syncing.
9. What’s a simple editing workflow for piano lesson videos?
-
Import footage and audio
-
Sync and trim
-
Add annotations or sheet music overlays
-
Export in 1080p or 4K
10. How do I add sheet music or finger numbers to my video?
Use video editors like Final Cut or DaVinci to add image overlays, or use apps like Synthesia or MuseScore to generate visual guides.
11. What microphone works best for capturing piano sound accurately?
A professional microphone condenser with a flat frequency response is ideal. The Maono PM500T is an excellent budget-friendly option.
Conclusion
Filming piano lessons can be a rewarding endeavor, both creatively and professionally. Whether you're teaching beginners or showcasing performance techniques, your success hinges on great audio, effective camera angles, and clear lighting.
Using the right microphone—preferably a recommended condenser microphone like those from Maono—makes all the difference in capturing the full richness of your piano sound. Pair that with well-thought-out camera placement and smart lighting, and you’ll elevate your content quality without stretching your budget.
With the tips in this guide, you’re well on your way to producing polished, engaging piano tutorials that resonate with viewers, students, and fellow musicians alike.
Related Article:
Affordable USB Mic Guide: Best Picks for Piano Sound Recording