


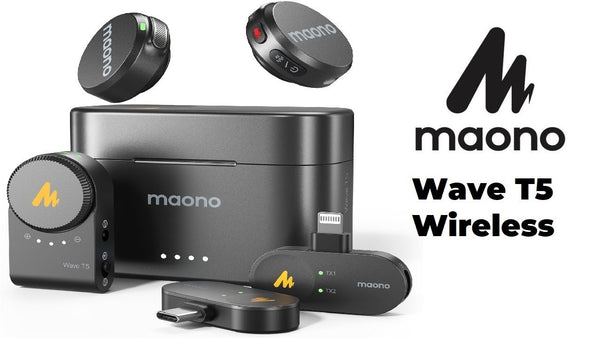
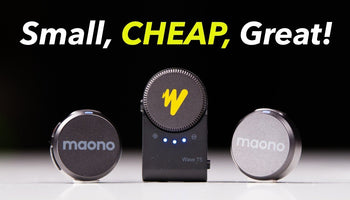
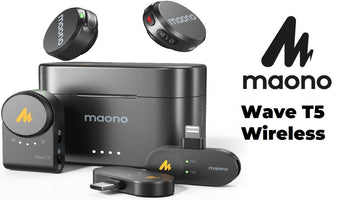
Maono T5 Wireless Microphone
Lavailar Microphone | Content Creation
Ⅰ. Studio-Grade Audio Quality
Ⅱ. Widely Compatible with Android, iOS Smartphones & Cameras
Ⅲ.Pro-level Intelligent Noise Cancellation
Ⅳ.Instant Pairing Out of the Box: enjoy plug-and-play convenience.
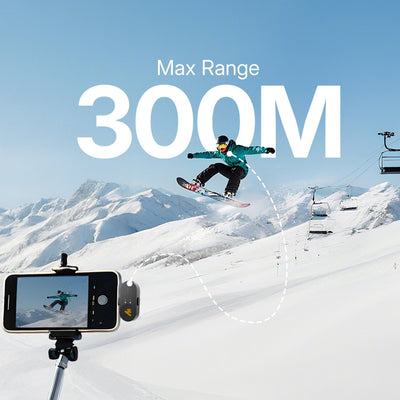
Ⅴ. Extended 30H Battery Life & 1000ft Reliable & Stable Transmission
Ⅵ. Mono and Stereo Recording

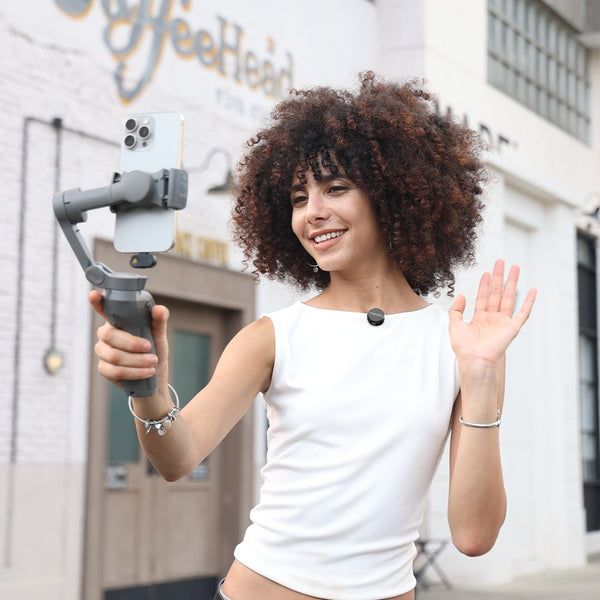
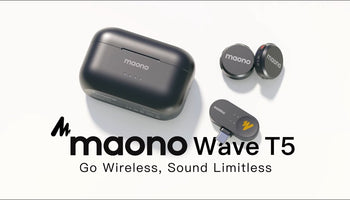
Go Wireless, Sound Unlimited
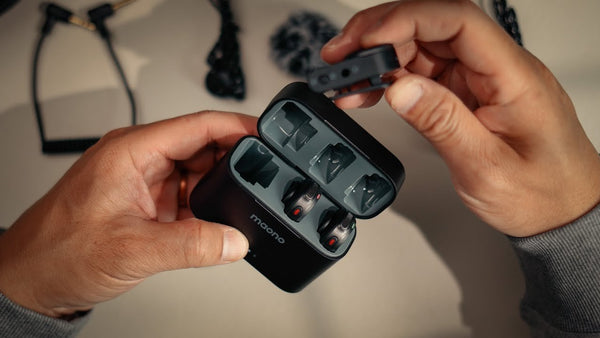
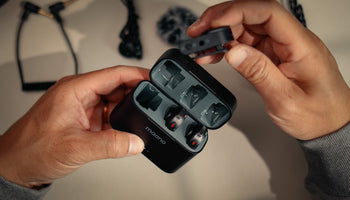
Instant Pairing Out of the Box
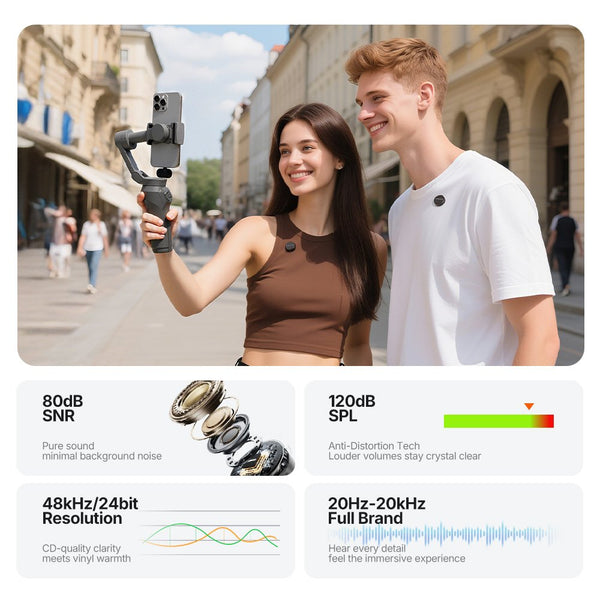
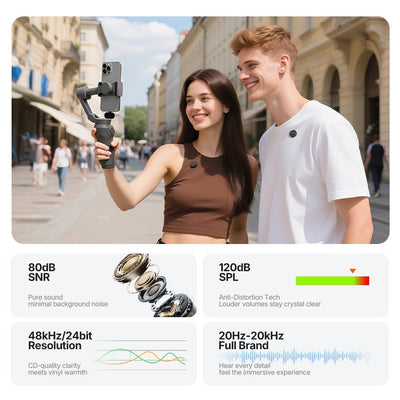
Studio Grade Audio Quality

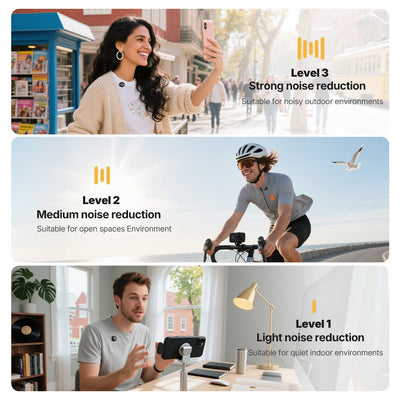
Pro-Level Intelligent Noise Cancellation

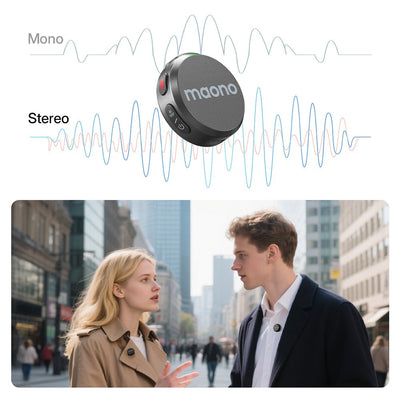
Mono & Stereo Recording


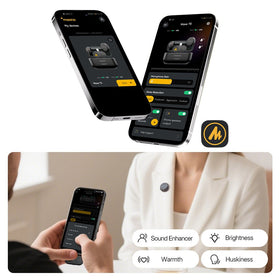
Exclusive Voice Filters
From warm to bright, unlock the full potential of voice with multiple preset voice filters, each tailored for a specific recording scenario. Achieving an attractive sound with minimal post-production is required.

1000ft Reliable & Stable Transmission
With frequency-hopping technology, Wave T5 delivers stable and clear audio transmission up to 300m (1000ft). Enjoy uninterrupted performance even in challenging environments.
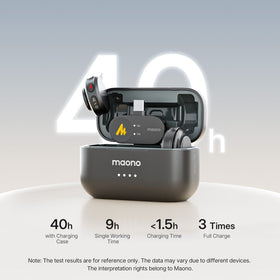
Extended 30H Battery Life
Enjoy up to 9 hours of battery life per transmitter, 30 hours with the compact charging case. Wave T5 also allows phone charging while recording, ensuring continuous use during long trips, interviews, live streaming, and other intensive usage scenarios.
Learn from Pro Reviews & Tutorials


I do think the pure audio quality coming out of the Maono system is excellent. And when you look at the range of the accessories you get, at the price point, I think the system is well worth considering.
It's great for mobile shooters, youtubers, run and gun shooters, the compatibility to use this with various platforms is priceless, and I think it's a moneysaver, you don't have to buy any extra gear which is a huge win.
This is very lightweight, coming in just at 9 grands. All in all, hands down awesome kit, highly recommend, you guys are going to love it.
Here you can find the details of how to use the Maono T5 wireless microphone...
5 Reasons Why Our Product is the Best Choice
The #1 Choice For Thousands Of Creators

Award-Winning Audio Microphone of Choice

All-in-One Audio Production Solution
Your Payment Security, Our Priority

Support that Always Stands
Download
SPEC
FAQs
After removing the Transmitter and Receiver from the Charging box, they will automatically power on and pair. A solid blue light indicates successful connection. Then, use the C-to-C adapter cable included in the package to connect the Receiver to the phone’s bottom data port.
For iPhone 14 and earlier models, the connection method is the same; the only difference is the type of adapter cable.
A dynamic microphone is more durable and captures much Mount the Receiver using the Back clip onto the cold shoe of your camera, then use the supplied 3.5mm TRS camera cable to connect the audio output port of the Receiver to the camera's microphone input (typically marked in red). After connection, it is recommended to adjust the gain settings based on the camera brand for optimal audio quality:
-Canon cameras: Set the recording mode to manual and adjust the gain to the first notch on the left.
-Sony cameras: Set the recording volume to 2dB.
-Nikon cameras: Set the microphone sensitivity to 3.
less ambient noises compared to a condenser microphone.
Back clip: Attach the Back clip to the Transmitter and wear it directly on your collar.
Magnetic sheet: Use the Magnetic sheet to secure the Transmitter on your collar, ideal for users who prefer not to use the Back clip.
Clear Explanation of the mono and stereo recording:
When using one mic:
*In mono mode, both ears can hear the sound.
*In stereo mode, only one ear can hear the sound.
When using two mic:
*Whether in mono or stereo mode, both ears can hear the sound. The difference is that in stereo mode, the audio output is separated, and each ear hears sound from a different mic. less ambient noises compared to a condenser microphone.