


Whether you're choosing a desktop mic stand or exploring options like a boom arm mic stand, understanding the right support gear can make or break your audio quality.
Introduction to Microphone Boom Arms for Sound Recording
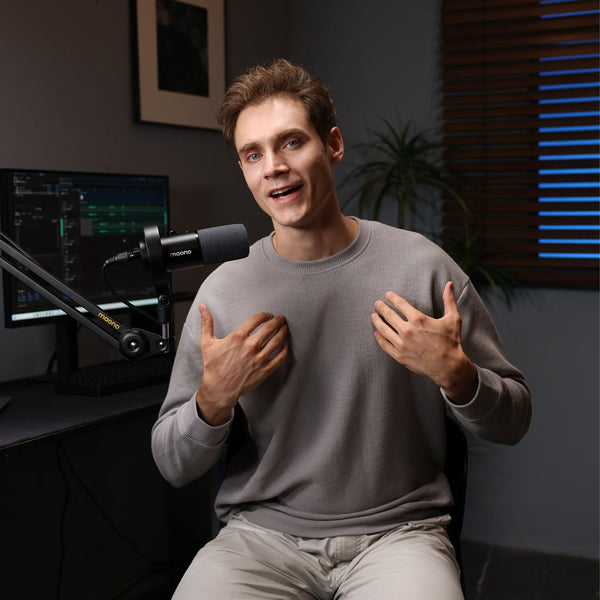
Sound recording is a crucial aspect of any professional audio production. Whether you're a podcaster, musician, or voiceover artist, having the right equipment is essential for achieving high-quality sound. One such piece of equipment that can greatly enhance your recording experience is a mic stand for recording, particularly a boom arm.
What Is a Microphone Boom Arm?
A microphone boom arm is an adjustable, clamp-on microphone holder that attaches to the edge of a desk or table, allowing users to freely move and position their mic at different angles. Unlike a desktop mic stand, which keeps the microphone fixed in one place, a boom arm offers greater flexibility and saves valuable desk space. This makes it especially useful for podcasters, streamers, and recording artists who need to adjust mic placement quickly while keeping their workspace clear and comfortable.
It’s a type of studio mic stand that features an extended arm (the "boom") adjustable in length and angle, providing added flexibility for positioning your microphone perfectly. For many setups, a desk mount boom arm is the ideal compromise between stability and reach.
Some friends have this question if your boom arm make your microphone sound any better? Actually, microphone boom arms are beneficial because they allow for more flexibility in microphone placement, which can result in improved sound quality and reduced background noise. They also free up your head and ears, making them more comfortable for long recording or streaming sessions. The fact is that the boom arm does not directly make your microphone sound better, but it can help you to adjust your microphone to a suitable position to avoid collecting background noise; then overall, the recording quality will be much better than you think.
In this buying guide, we will explore the benefits of using a boom arm mic stand for professional sound recording, factors to consider when choosing the best desktop mic stand, and some top-rated options, including the best mic stands for streaming and the best studio mic stand options for home setups.
What Makes the Best Desktop Mic stand?
When looking for the best desktop mic stand, there are several features to consider, such as portability, stability, adjustability, and compatibility with your microphone. For streamers, the best mic stands for streaming typically offer flexible positioning and a sturdy base to minimize vibrations and noise. On the other hand, those setting up a home studio will want a stand that provides solid support for longer recording sessions and a professional appearance. If you’re considering a mic boom arm instead of a desktop stand, here are some key factors to keep in mind:
-
Portability
Boom arms are lightweight and easy to move, while desktop stands are heavier and stay fixed in place.
-
Stability
A desktop stand usually has a weighted base for steadiness, while a boom arm relies on secure clamping to the desk. If you need extra durability, look for a heavy-duty mic boom stand built for larger setups.
-
Adjustability
A mic boom arm offers greater flexibility with height and angle adjustments compared to the limited range of a desktop stand. If you prefer a more traditional stand that still offers movement, consider an adjustable mic stand.
-
Best Use Cases
Boom arms are ideal for home studios, podcasting, streaming, and recording instruments, while desktop stands are better suited for stationary setups or travel-friendly recording.
Boom Mic vs. Desktop Mic Stand: What’s the Difference?
A microphone boom mic, often mounted on a boom arm or boom pole, provides extended reach and flexibility, especially in film, podcasting, or voiceover environments. Unlike desktop mic stands that rest directly on a surface, a boom mic stand suspends the microphone above or around your workspace, allowing for better placement without cluttering your desk.
If you're recording while sitting at a desk but need freedom of movement or want to eliminate table vibrations, a boom mic setup might be the better choice. While a desktop mic stand is compact and perfect for static setups, a microphone boom mic gives you better positioning control, especially when space or angles are limited. Many creators prefer boom arms for cleaner visuals and reduced handling noise. A microphone arm for streaming is specifically optimized for on-camera looks and quick adjustments during live sessions.
Example Boom Mic Setup:

Benefits of Using a Mic Boom Arm
A mic boom arm offers several advantages over traditional desktop stands, making it a popular choice for creators and musicians who want flexibility and cleaner recordings. By keeping the microphone off the desk and fully adjustable, a boom arm enhances both audio quality and workspace efficiency. Some of the main benefits include:
-
Hands-free recording – Keep your mic steady while you focus on speaking, singing, or playing instruments.
-
More desk space – Free up valuable surface area by clamping the boom arm to the edge of your desk.
-
Better positioning for vocals/instruments – Easily adjust height, distance, and angle for optimal sound capture.
-
Less chance of vibrations being picked up from the desk – Isolates your mic from keyboard taps, mouse clicks, or desk bumps for cleaner recordings. Pairing the arm with a boom arm with shock mount further reduces mechanical noise.
Top Five Picks for the Best Desktop Mic Stands for Recording
Tripod Microphone Stand: These types of stands are very versatile and used in a wide variety of situations. They feature a three-legged tripod base that provides superior stability while still being very easy to fold and carry, making them ideal for musicians on the go.
Microphone Boom Arm Stands: These specialized stands feature an extendable boom arm, making them ideal for situations where you need the mic to get over physical obstacles, such as drum kits, guitar amps, or even ensembles of musicians.
Desktop Microphone Stands: As the name suggests, these are mini-sized stands designed to fit perfectly on a desktop or other limited-space setup. They are especially popular in podcasting scenarios where desktop accessibility is crucial. Check out the best desktop microphone stands in Maono.com.
Low Profile Stands: These stands are uniquely designed with a shorter height, making them perfect for miking low-frequency instruments like kick drums and guitar amps. Their low profile ensures you capture the correct audio levels from these specific instruments.
Round Base Microphone Stands: Known for their thick, round base, these stands provide ultra-stable support for your microphone. However, due to their weight and design, they are less portable than other types and therefore more suitable for stationary settings.
Generally, more users will install a retractable boom arm on their desktop, so that they can move the mic stand directly in front of them during use, and the sound reception effect will be relatively better. It is generally used in games, and live broadcasts, There are many scenarios such as podcasting and recording.
Here’s a comparison table featuring different types of desktop microphone stands (updated):
|
Microphone Stand Type |
Description |
Pros |
Cons |
|
Fixed Desktop Microphone Stand |
A compact, stationary stand with a sturdy base. Often made of metal or plastic, designed for desktop use. |
- Compact and stable- Easy to set up- Affordable |
- Limited adjustability- Not ideal for users needing flexible positioning |
|
Adjustable Desktop Microphone Stand |
A stand with adjustable height and angle, offering more flexibility in positioning the mic. |
- Adjustable height and angle- Provides better ergonomics- Great for podcasts and streaming |
- Takes up more space- May require additional stabilization for heavier microphones |
|
Tripod Desktop Microphone Stand |
Features three legs for added stability, similar to a traditional tripod design but compact for desktops. |
- Lightweight and portable- Easy to store- Stable for most microphones |
- Limited height adjustability- Can be bulky for small desks |
|
Mini Desktop Microphone Stand |
A smaller version of a desktop stand, ideal for compact spaces or where minimal setup is needed. |
- Space-saving- Highly portable- Good for smaller microphones like lapel mics |
- Not suitable for larger or heavier microphones- Less stability for extended recording sessions |
|
Boom Arm Desktop Microphone Stand |
A versatile arm with an adjustable boom that allows flexible positioning of the microphone over the desk. |
- Maximum flexibility- Eliminates desk clutter- Reduces handling noise |
- Takes up more desk space- Requires proper installation- Can be more expensive |
|
Heavy-Duty Desktop Microphone Stand |
A sturdy, larger stand with a solid base designed to support heavier microphones. |
- Supports heavy microphones- Very stable- Durable |
- Can be bulky- Typically more expensive- Not ideal for small desks |
Factors to Consider when Choosing a Microphone Studio Stand for Recording
Weight capacity: When selecting a boom arm for professional sound recording, there are several factors to consider. Firstly, you need to ensure that the boom arm is compatible with your microphone. Different microphones have varying sizes and weights, so it is important to choose a boom arm that can securely hold your specific model. Additionally, consider the length and reach of the boom arm. This will determine how far the microphone can extend, allowing you to adjust its position according to your recording setup.
Stability and durability: Another crucial factor is the stability and durability of the boom arm. Look for models that are constructed from high-quality materials and have sturdy joints and clamps. This will ensure that the boom arm remains steady during recording sessions and can withstand regular use. Additionally, consider the ease of use and adjustability of the boom arm. Look for features such as adjustable tension knobs or quick-release mechanisms, which allow for effortless positioning and locking of the microphone.
Ease of installation: If you are just beginning with picking up a boom arm for your microphone, then I will suggest you pick up the one with easy installation, it would be perfect if it can automatically sort out the cable inside to make it look more portable and compact. A boom arm with shock mount or integrated cable channel will save time and reduce setup clutter.
Desk Space Usage: This is one of the most important considerations. You must first determine the width, length, and thickness of your desktop to ensure the microphone stand or boom arm you’re planning to buy will fit properly. Avoid situations where your table is too small for the boom arm to extend or retract, or too thick for the clamp to attach securely.
A good studio mic stand balances flexibility, durability, and compatibility with your microphone.
Boom arm accessories and additional features to consider
In addition to the boom arm itself, there are several accessories and additional features that can enhance your sound recording experience. Pop filters, for example, are essential for reducing plosive sounds and minimizing unwanted noise from breaths. Shock mounts are also important for isolating the microphone from vibrations and handling noise. Some mic boom arms may come bundled with these accessories, while others may require separate purchases.
Another feature to consider is cable management. Look for boom arms that have built-in cable routing systems or cable clips to keep your recording setup organized and free from tangled cables. Additionally, consider the mounting options available with the microphone boom arm. Some models may come with various mounting options, such as desk clamps or wall mounts, allowing for greater flexibility in setting up your recording space.
Setting up and using a boom arm for optimal sound recording
Setting up a boom arm for optimal sound recording is a straightforward process. Start by attaching the boom arm to a sturdy surface, such as a desk or mic stand. Ensure that the boom arm is securely fastened and that all joints and clamps are tightened. Next, attach your microphone to the end of the boom arm, using a shock mount if necessary. Position the microphone at the desired height and angle, taking into consideration the sound source and recording environment.
Once the boom arm is properly set up, it is important to adjust the tension and balance to achieve optimal performance. Use the tension knobs or quick-release mechanisms to adjust the height and angle of the microphone. Experiment with different positions to find the sweet spot that captures the desired sound. It is also recommended to test the setup by recording a sample and listening back to ensure that the sound quality is satisfactory.
Can any boom arm work with any microphone?
Actually, you have to consider the compatibility of your microphone head and stand, Some stands are more suitable for microphones with shock mounts, and some are not. You might have to consider the weight of the microphone head, if your microphone head is relatively heavy, it is not suitable to use a lighter stand, otherwise, it will be top-heavy, which will not be conducive to the use of your microphone.
Benefits of using a boom arm for professional sound recording
A boom arm serves as a versatile and convenient tool for positioning your microphone during recording sessions. One of the primary benefits of using a boom arm is its ability to eliminate unwanted vibrations and handle noise. By suspending the microphone in mid-air, it allows for a more stable and cleaner sound capture. This is especially beneficial when recording vocals or any other sound source that requires precision and clarity.
A boom arm also makes using the mic more comfortable. It eliminates the need to hold the microphone for extended periods, reducing strain on the arms and hands. This is particularly advantageous for long recording sessions, as it allows you to focus on your performance without any discomfort. Additionally, a boom arm provides greater flexibility in positioning the microphone, enabling you to find the optimal placement for capturing the desired sound.
Using a microphone stand can significantly improve sound quality and recording efficiency in various setups.
Enhanced Recording Efficiency
- Hands-Free Operation: Using a stand allows the performer or speaker to have their hands free, enabling them to focus on delivering their content without having to hold the microphone. This is especially beneficial in podcasting and live performances.
- Quick Adjustments: Many microphone stands are adjustable, allowing users to easily change the height and angle of the microphone as needed. This flexibility can save time during recording sessions.
Examples of Different Recording Setups:
- Home Studios: In a home studio setup, a boom arm stand can be mounted to a desk, allowing for easy positioning of the microphone in front of the vocalist or instrument without taking up valuable space. This setup can enhance the audio quality by ensuring the microphone captures sound from the optimal angle while reducing background noise.
- Podcasting: For podcasters, a sturdy desk stand can provide stability and convenience. A microphone positioned at the right height ensures that hosts and guests are captured clearly. Additionally, having the microphone securely positioned prevents handling noise, which can disrupt the flow of conversation and affect overall sound quality.
- Live Performances: In live settings, using a floor stand can ensure that the microphone is properly positioned for singers or speakers while allowing for dynamic movement. This setup helps maintain audio clarity, as the microphone remains at a consistent distance from the performer’s mouth, even during movement. Also, using a pop filter attached to the stand can help reduce plosive sounds, enhancing the overall sound quality during performances.
Overall, a microphone studio stand is an essential tool for improving both sound quality and recording efficiency, regardless of the setup. Whether in a home studio, podcasting environment, or live performance, investing in a good microphone stand can make a significant difference in the final audio output.
Recommended Mic Boom Arms for Recording
Here are the three best desktop mic stand for streaming and recording for you to choose from
Maono B01 microphone boom arm
B01 fits a relatively light microphone head, plus it can rotate 360 degrees, The adjustable arms can be folded up and are easy for you to carry around and allow you to adjust the suitable angle and height to record your good voice.
Easy for you to adjust the position and angle of your mic. Equipped with strong springs, this metallic mic boom arm is stable for use. (Max load: 2.2lbs)

Maono BA90 microphone boom arm
If you don't like the microphone taking up too much public space and want to look cleaner and tidier, then this BA90 must be the best choice. A classy aluminum build, concealed springs, and cleverly disguised cable management system offer a suave on-camera experience. The hand-tightened friction hinges reduce unwanted noises during recording, and a 360-degree swivel allows you to adjust the mic position in any direction you want.

Maono BA92 microphone boom arm
In comparison, BA92 occupies a larger desktop area. In addition, its height will be lower, but the installation method is the same. They are all 360-degree rotatable brackets that can be installed on the desktop.

Maintenance and care tips for your boom arm
To ensure the longevity and optimal performance of your boom arm, it is important to practice proper maintenance and care. Regularly inspect the joints, clamps, and other moving parts for any signs of wear or damage. Clean the boom arm using a soft cloth or brush to remove any dust or debris that may accumulate over time. Avoid applying excessive force or pressure when adjusting the boom arm to prevent unnecessary strain on the joints.
Additionally, be mindful of the weight capacity of your boom arm and avoid exceeding its limits. This will prevent any potential damage or accidents during recording sessions. When not in use, store your boom arm in a safe and secure location, away from moisture or extreme temperatures. By following these maintenance and care tips, you can ensure that your boom arm remains in optimal condition for years to come.
Budget-friendly boom arm options for beginners
For beginners or those on a tight budget, there are several budget-friendly boom arm options available that offer good value for money. Maono B01 Boom Arm mentioned earlier, is a popular choice among beginners due to its affordability and reliable performance. Another option is the Maono BA92 Boom Arm, which provides solid build quality and easy-to-use features at a budget-friendly price point.
It is important to note that while budget-friendly boom arms may not offer the same level of durability or advanced features as their more expensive counterparts, they can still provide a significant improvement over handheld microphones. They are a great starting point for beginners to experiment with professional sound recording and gain experience before investing in higher-end equipment.
Comparison of boom arms from different brands
When choosing the best boom arm for your professional sound recording needs, it is helpful to compare the offerings from different brands. Consider factors such as build quality, stability, adjustability, and additional features. Pay attention to customer reviews and ratings to gauge the overall satisfaction and performance of each boom arm. Additionally, take into account the compatibility with your microphone and recording setup.
By comparing boom arms from different brands, you can make an informed decision based on your specific requirements and budget. Keep in mind that the best boom arm for you may not necessarily be the most expensive or feature-rich one. It ultimately comes down to finding the right balance between performance, affordability, and compatibility with your recording setup.
How to Install and Optimize Your Microphone Boom Arm Setup for the Best Recording Experience
Setting up a microphone boom arm correctly can dramatically improve your recording comfort and sound quality. Begin by securely mounting the boom arm to your desk using the included clamp or grommet—tighten it until it’s stable but not overly forced to avoid damaging your table.
Next, attach your microphone or shock mount to the arm’s threaded end, then carefully adjust the tension or springs so the arm holds your mic’s weight without sagging or bouncing. Position the microphone about 6–12 inches from your mouth, slightly off-center to minimize plosives and breathing sounds.
For a clean and safe workspace, use the built-in cable routing channels or Velcro ties to guide the mic cable along the arm, preventing tangling and accidental pulls.
Lastly, ensure your boom arm is isolated from vibration or desk noise by keeping it clear of monitor stands and other equipment—using a shock mount or rubber pads under the clamp can further reduce unwanted noise. With proper installation and adjustment, your boom arm will deliver stable positioning and professional-level audio clarity for streaming, recording, or podcasting.
Microphone Boom Arm FAQs
Ⅰ. How far should the boom mic be from your mouth?
It depends, If you're using a dynamic mic, ideally place the mic between 5-15cm (2-6 inches) from your mouth. Condenser microphones like the XCM-50 are more sensitive and can be placed further away, typically between 10-20cm (4-8 inches). But these data are for reference only, you can adjust it to a position you feel comfortable with.
Ⅱ. Do boom mics pick up background noise?
Generally, a boom arm may add unwanted noise to the background. However, Maono boom arms are designed with internal springs for silent operation, helping prevent vibrations or unwanted sound from being picked up by the mic. Additionally, sound pickup is related to the microphone itself and not the stand. It's recommended to use a microphone with noise reduction, which you can also purchase from Maono.
Ⅲ. Is a microphone boom arm worth it?
As a general rule microphone boom arm is the best solution if you record at your desk. They are great to lock in a position and enjoy the comfort of work, with a clean desk setup. They provide a safe and flexible work environment for your mic and look professional if you record videos or stream.
Ⅳ. Can any boom arm work with any microphone?
It was mentioned earlier that different microphone types are suitable for different types of microphone stands. Different microphone head weights are suitable for different stands, and the effects are also different. In addition, you need to choose according to the size of your desktop.
V. What is the best desktop mic stand for streaming and recording?
The best desktop mic stand for streaming or recording depends on your needs for stability, flexibility, and space. For those seeking a sleek and professional design with excellent cable management, the Maono BA90 is a top choice. It features a sturdy aluminum build, concealed springs, and a 360-degree swivel for easy mic positioning. If you're looking for a more robust option that can support heavier microphones and offers more desktop area, the Maono BA92 is ideal. It provides great stability and adjustable height, making it perfect for various recording environments. Both options offer excellent quality and performance for serious audio recording.
VI. Is a mic boom arm better than a desktop stand?
It depends on your needs. A mic boom arm offers more flexibility, frees up desk space, and reduces vibrations, while a desktop stand is simpler and more portable.
VII. Do I need a mic boom arm for podcasting?
Not necessarily, but it’s highly recommended. A boom arm helps position your mic at the right angle, keeps your hands free, and improves audio quality during long podcast sessions.
VIII. What’s the difference between a mic boom arm and a mic stand?
A mic boom arm clamps to your desk and allows full adjustability, while a mic stand (desktop or floor) is fixed in place and usually less flexible in positioning.
IX. Can any mic use a boom arm?
Most microphones can use a boom arm as long as they have a compatible mounting thread or an adapter. Standard boom arms support 3/8" or 5/8" threads, which fit most mic clips and shock mounts. Just make sure the arm can handle your mic’s weight.
X. Will a microphone boom arm reduce noise?
Yes, a microphone boom arm can help reduce noise by keeping the mic off your desk and away from vibrations caused by typing or movement. Pairing it with a shock mount further minimizes unwanted mechanical noise.
XI. Is a boom arm necessary for podcasters/streamers?
While not strictly necessary, a boom arm is highly recommended for podcasters and streamers. It frees up desk space, allows flexible mic positioning, and ensures consistent audio quality, making recording more comfortable and professional.
XII. What are some of the common problems of using a microphone boom arm and how to troubleshoot them?
-
Sagging arms: Tighten the tension knobs or adjust the springs to match your mic’s weight.
-
Noisy hinge: Apply a small amount of silicone lubricant to the joints.
-
Desk resonance: Use rubber pads or isolation mounts under the clamp to absorb vibrations.
-
Incorrect tension adjustment: Rebalance the arm so it holds position without drifting.
-
Mic too heavy for the arm: Upgrade to a stronger boom arm designed for heavier microphones.
-
Cable interference: Use built-in cable channels or clips to keep cables tidy and noise-free.
XIII. How much weight should a boom arm support?
A good microphone boom arm typically supports between 1 to 4 pounds (0.5–2 kg), depending on its build quality. Always check the manufacturer’s specs to ensure your mic setup stays secure and balanced.
Conclusion and final thoughts on choosing the best boom arm for professional sound recording
Choosing between a desktop mic stand and a microphone boom arm stand depends on your recording needs. Streamers may benefit from flexible boom arms, while podcasters may prefer sturdy desktop options. A well-chosen studio mic stand ensures better sound capture and a more professional setup.
Remember to explore the 3 best mic boom arms mentioned in this guide, as well as the accessories and additional features that can further enhance your sound recording experience. Set up your boom arm correctly, adjust the tension and balance, and experiment with different positions to find the optimal sound capture. With proper maintenance and care, your boom arm will continue to deliver exceptional results for years to come.
If you require more flexibility or record from various positions, a microphone boom mic may be the ideal companion to your setup.
Investing in a high-quality boom arm is a wise decision that will greatly benefit your professional sound recording endeavors. So, take your time, do your research, type in: “microphone stands near me” from your browser or go directly to Maono.com and choose the boom arm that will take your recordings to the next level.
Also Read:
Mic Stands Explained: Types, Features & Tips for Choosing the Best
Exploring Microphone Stands: Types, Functions & Budget Picks