ARENA USER GUIDE
ARENA USER GUIDE
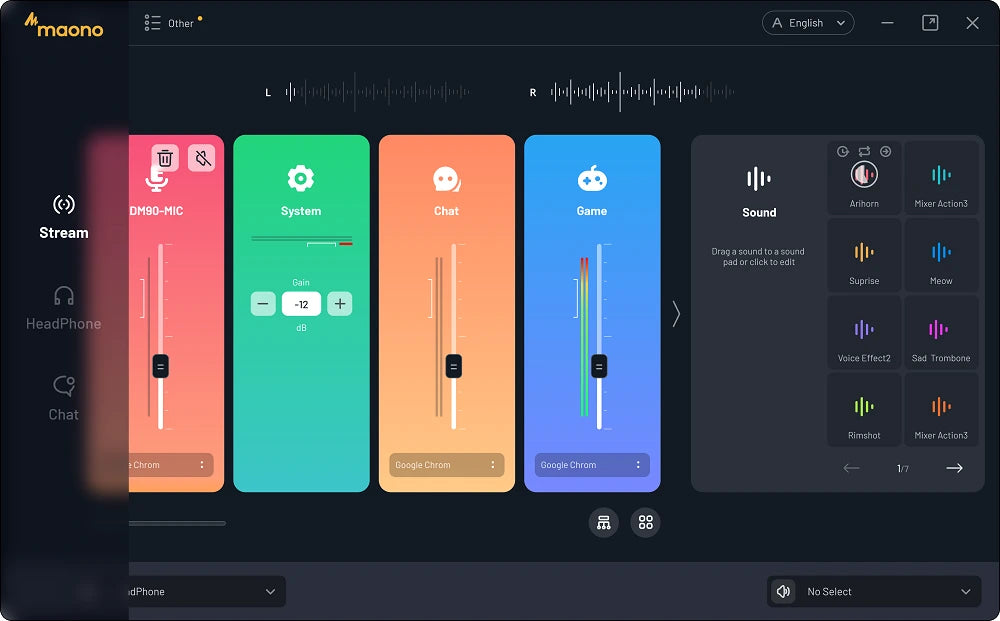
FEATURE INTRODUCTION

- 1. Audio source settings
- 2. Submix selector
- 3. Channel level meter
- 4. Channel fader(level)
- 5. Settings menu
- 6. Gain adjust
- 7. Stream source level
- 8. Next Channel
- 9. Language selector
- 10. Sound pads
- 11. Switch pages
- 12. Output device selector
- 13. Output device mute
- 14. Extend panels
- 15. Fast mute table(show and controls)
- 16. Channel mute
- 17. Channel delete

- 1. Collapse & Unfold State
- 2. About
- 3. Firmware Upgrade
- 4. Application output audio configuration
- 5. Options
- 6. Audio input managerment
- 7. Headphone mute
- 8. Headphone selection
- 9. Configured Application List Display
THE SUBMIX CONTROLS

- 1. Playback marker
- 2. Submix level meter
- 3. Submix level fader
- 4. Link/Unlink Channel to/from Stream Mix"
- 5. Stream mix audio level indicator
- 6. Channel disabled in Submix
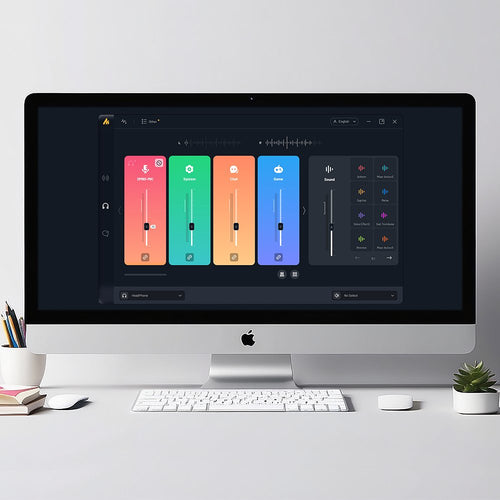
HOW ARENA WORKS
Arena is software that brings together
multiple audio sources. Each audio
source has an independent channel
and slider in UNlFY, so you can adjust
the level of each. if you want to highlight your voice, you can lower the volume of your music and increase the volume of your voice, for example. Then the
output of UNlFY is fed into your
streaming software.
Arena sits between your audio sources
and your stream, so audio from your
microphone and your game and so on
goes into Arena, and the output of
Arena goes into your stream. There is
no need to select those audio devices
again in your streaming software, as
Arena is already managing them all for
you. All you need to do is use Arena's
audio output as your audio input source
AUDIO SOURCE MANGEMENT

Audio Input Management
When you turn it on for the first time, the first step is to bring each audio source into Arena." We've added all audio sources by default, and they'll also be displayed here when you connect to a Maono microphone. If this is your first time using Arena, you will see the Audio Input Management window when you start Arena. If you have opened it before, you will see the mixer window, but you can open the audio input management window again by selecting it from the menu on the left.
The Different Device Types
Audio Input Management Window is where you choose what audio sources you need. All the available sources are shown at the bottom. There are two types.
Audio devices are Maono hardware devices. They include microphones, and sources from interfaces such as the DM30RGB, PD200X, PD400X, and so on.
Virtual devices are the connectors for your computer applications. These connect the audio from your game, chat, browser, etc with Arena so that Arena can mix them and send them on to your stream.


Selecting the Audio Inputs You Need
To add the audio devices you need for your stream, click the '+' icon next to the available devices and they will be added to the mixer configuration. The available devices will be indicated by highlighted icons. These icons represent the devices that can be added. When you hover your mouse over the icon, a '+' will appear. If you have already added the device, the icon will be disabled."
You can remove from the mixer by clicking on the ‘trash’ icon that appears when you click on them if there's any devices that you do not need.
You can also drag your sources around to put them in the order you prefer. Most commonly used, you can put them on the first page of the mixer.
If you want to restore all devices to their initial state, you can click the "Reset" button and the panel will return to its default state. When you hit the Done button, all the devices of the mixer will be displayed in the order you set.
Adding Microphones
You can add up to four audio sources to your stream. Some Maono USB microphones that inbuild DSP are supported. (DM30&DM30RGB&PD200X&PM400X&DM50&PM450, more devices will be added in the future), meaning you can have multiple people on your stream or podcast.
For example, you can connect two DM30RGB microphones or even a mix of different Maono mics. They will appear as sources and can be dragged up to the mixer configuration.
Each person then plugs their headphones into their microphone. This will allow them to hear both their voice and all the other audio sources connected to Arena.


The Difference on Chat Device
Audio from other applications is allowed to be connected to each virtual input channel in Arena, and they all participate in the mix in the same way. While the Chat input channel is slightly different, it also offers PlayBack capability, allowing audio to be sent back to the app. This means that when you are chatting with multiple people at the same time, they can also hear your voice.
ROUTING AUDIO FROM OTHER APPLICATIONS
How to Connect Virtual Devices
Arena provides six virtual input channels that exist in your PC as audio devices. When you first install Arena, you need to set the audio output of the application to the virtual input channel you want.
Here are three ways to help configure the audio output device of your application.


Automatically Configure Application Output to a Virtual Channel
You can click the " M+ " icon in the upper left corner of the mixer, and then an audio settings window will pop up. From here, all open audio applications will be displayed in the list box. You can select an application, and Arena will automatically set its audio output to the corresponding virtual audio channel. Once set up, the audio output by your application will go into a virtual channel and appear in the mixer.
If you no longer need the sound of the app, you can also quickly uncheck it from here. This is the most convenient way to operate.
When you're done setting up the app output, the app icon will appear on each channel under Stream Mix.
Manually Configuring Audio Sources to Use Virtual Channels
To assign a program to the correct virtual channel, you need to open the settings, and then find the ‘audio’ or ‘device’ option in your program. There you will find a setting where you can select the ‘speaker’ or ‘audio output’ settings.
For example: If you want Discord to appear on the "Chat" channel of Arena, go to the audio settings in Discord and select "Chat OutPut (Maono Arena)" as the audio option.
Then you need to do the same for other programs, setting them to the correct virtual channel.

Using Windows to Assign Virtual Channels
Some programs (eg browsers) may not have their audio settings. However, it is still possible to assign them to a specific virtual device using the Windows control panel. To do this:
1. Ensure the application you want to assign (eg the browser, music player, etc) is running.
2. Click the ‘Launch windows settings’ button in UNIFY – it’s the top left button next to the menu. This will show the Windows audio control panel. Every program on your computer that is open and has audio capability is listed.
Look for the specific program you want to assign, and set the ‘output’ settings to the desired UNIFY virtual device.
If the program is going to be used for comms, then you will also need to set the input to the ‘Chat’ device.
Checking Your Configuration
If you have followed all the steps to this point, you should be good to check your configuration. Connect your headphones to your microphone headphone output. Try playing audio from each application that you should see appear in Arena, hear it in your headphones, and be able to adjust the volume of each source using the sliders. You should also be able to hear your voice when speaking into the microphone. If you have other hosts with microphones connected, they too should be able to hear everything through headphones connected to their microphone.

GETTING AUDIO TO YOUR STREAM
Assigning Arena Output to Your Stream
Now you have all the audio sources routed to Arena, you need to ensure the output of Arena is feeding your stream. To do this, go to the audio settings of your streaming software. Each software has very different settings for this, but you need to ensure that the only audio device that is feeding audio to your stream is ‘Stream Input (Maono Arena)’. If you can see there are other sources also selected you should remove them.

SETTING UP YOUR MICROPHONES AND DEVICES

Setting Up Audio Devices
To finalize the setup of your audio devices, you need to set the Gain, and also any audio processing you need. To do this, click the icon for the microphone or device you want to set up. The most important setting is the Gain, which sets the overall level of the microphone. Then you can adjust the microphone volume to find a more comfortable volume value, of course, this can be adjusted at any time, it is a fader that you see first.
For USB microphones such as the DM30&DM30 RGB:
Slide the gain fader until the meter is peaking well into the green target section, without going into the red.
Setting Up Virtual Devices
Virtual devices usually do not need further setup, but you can adjust the Gain (overall level) of each source if you need to. To do this, click on the icon above the slider. You can then adjust the gain up or down as needed, using the meter as a guide. Remember that when you mix lots of sources, the overall level will be higher than any individual source.

AUDIO PROCESSING
Configuring Audio Processing
Arena offers several powerful DSP processing that is built into your Maono USB microphone or interface. This allows you to add professional audio processing including noise gate, compressor and even the legendary APHEX effects. Of course, if you need to adjust the processor in more detail, we also provide powerful DSP processing such as noise limiters, compressors, tooth cancellers, phase shifters, etc., but you need to do this in our other microphone setup software, Maonolink.

MICROPHONE CAPABILITY
RGB Lights

Setup RGB light
The Maono microphone has RGB lighting capability, which can make you more dynamic while broadcasting. On most devices, we offer up to 8 default lights, which can be switched freely using buttons on the device or selected in Arena. In some devices, we allow users to freely choose the light color to add to the settings panel, and when you set it, the device will also display your color in real-time, such as DM50, or PM450. In the right situation, you may need the light to breathe or circulate, then you can set it up with a simple choice. You can adjust the brightness of the light through the slider, for example, during the day, when the light is full, you need to increase the brightness to achieve a better display effect. At night, low brightness can achieve satisfactory results. And when you don't need the light, you can also choose to turn it off.
Lighting Effects
Some Maono microphones have powerful DSP capabilities, such as DM50 and PM450, and we allow users to freely choose the color of the light to add to the settings panel, and the device will display it in real-time when you choose the appropriate color. In some scenarios where you need the light to breathe or circulate, you can set it up with a simple choice. Here's how you can do it:
1. Use the mouse to select the desired color on the color palette, the color you click will be displayed on the device at the same time, and the color block you selected will also be displayed on the right side of the color palette. When you have confirmed the selected color block, you can click "+ Add" to add your selected color block to the alternative.
2. The alternate color block will be displayed under the "Light Color" column, when you need to change the color of your choice, you can use the edit button to make it enter the editing state, and then delete it.
3. In some specific occasions, if you don't need the lights, you can turn off the lights through the light switch above the color palette. If you just need to dim or brighten the light, you can adjust the brightness to the appropriate brightness via the slider on the left side of the swatch.


Microphone Directivity
For some devices, such as the DM50 microphone, we offer a directional option that can help users achieve the best sound in different situations. Like what:
Omnidirectional: Suitable for conference calls, recordings, events/orchestras
Cardioids: Podcasts, voiceovers, vocals, instruments
Figure 8: Interview, Instrumental, Duet, Stereo
Microphone Monitoring
In some microphones, we provide a monitoring ratio adjustment function, you can dynamically change the ratio of microphone monitoring and output to the computer through the slider, when the slider slides completely to the side of the microphone icon, the output volume to the computer will be 0, and you will not hear any sound from the computer. When the slider slides to the side of the computer icon, the microphone's monitoring headphone output will no longer have sound. This way, you can dynamically change the monitor as you work in the environment.

EQUALIZER AND SOUND EFFECTS

Sound Effects
In some microphones, we provide quick ways to set sound effects, such as "bass", "natural", "bright", and "classic" in the tone adjustment, you can choose the effect that suits you.
Equalizer
In the equalizer we also provide shortcuts, "Flat", "Low Cut", "Mid Frequency Boost", "Low Cut & Mid Frequency Boost", "Custom".
In some devices with more powerful DSPs, we provide more detailed modulation in MaonoLink. If you can't get the adjustment you need in Arena, you can adjust the effect you need in Maonolink in advance.
SUBMIXING
Mixing
Submixing is one of the most powerful features of our Arena, which can create different mixes for different devices. For example, you can turn down your sound level while using headphones without affecting the output stream. During a live stream, you can output only your voice and sound effects to the Discord channel and still output the full mix to your stream.

Submix Selection
In Arena, we have three submix modes: "Stream", "Headphone", and "Chat", which you can select by clicking on the left sidebar of Arena.
"Stream" provides an output stream for live streaming, "Headphone" for headphone monitoring, "Chat" for chat mixing, and three sub-mixing modes can be selected arbitrarily, so this setting is just for your convenience.
How do I Create My Own Mix?
Link slider
By default, linking is turned on, which means that when the level of the output stream changes, the level in the submix will follow suit. When you adjust the submix level, it means that the submix will be offset from the mainstream output level, and this offset will change in proportion to the shift when you adjust the output stream level. For example, if you set the voice level in the headphone submix to half the volume in the stream mix, but then lower the voice volume in the stream mix, the voice volume in the headphone submix will be further reduced, so the volume will still be half. This link status is indicated by a black Chain symbol below the slider, and a white arrow block next to the submix slider indicates the current mainstream output level position.
Unlinked sliders
You can completely separate the submix level from the stream mix by clicking the icon below the slider, making it appear gray "Unlinked". This means that the level in the submix will not follow the mainstream output level, and you can set the level of that source in the submix completely independently of the stream mix.
Delete the source
You can mute the audio source from the submix by hovering over the input channel of the submix and clicking the Cancel icon that appears above the source name. You can do this by restoring it to the mix again.


Stream Level Indicator
When you create a submix, the white arrow symbol to the right of the slider indicates the level of the source in the mainstream mix, and the current level scale value is displayed on the arrow.
You can reset the level of a single source in the submix to match the stream mix by clicking on this white arrow icon (if the submix is not linked, you need to click the "link" icon below to enable the link feature and the fader will automatically sync to the white arrow position)
How to use Chat Submixes
The original intention of setting up a Chat submix is to send clean audio to your communication app (such as Discord or Zoom), as sending a full mix can distract your chat participants. For example, you may only want to send your own voice and SoundPad sound to Discord. So, in a submix in Chat mode, you can keep only the microphone and SoundPad as source inputs. All other inputs can be masked by hovering over the Channel and clicking on the "Disable" icon that appears above the source name (you can also unlink the slider and turn it down to zero)
If you want your voice to always go into the chat, whether you're fading in or out of a stream mix, you can unlink it from the stream mix to make it gray by clicking the black Link icon below the slider.
(Note that for Chat submixes, the Chat input channel is disabled by default.) Regardless of what audio you choose to send to the chat, you should disable Chat input to prevent line echoes and feedback. )


How to Use Chat Submixes
The original intention of setting up a Chat submix is to send clean audio to your communication app (such as Discord or Zoom), as sending a full mix can distract your chat participants. For example, you may only want to send your own voice and SoundPad sound to Discord. So, in a submix in Chat mode, you can keep only the microphone and SoundPad as source inputs. All other inputs can be masked by hovering over the Channel and clicking on the "Disable" icon that appears above the source name (you can also unlink the slider and turn them down to zero)
If you want your voice to always go into the chat, whether you're fading in or out of a stream mix, you can unlink it from the stream mix to make it gray by clicking the black Link icon below the slider.
(Note that for Chat submixes, the Chat input channel is disabled by default.) Regardless of what audio you choose to send to the chat, you should disable Chat input to prevent line echoes and feedback. )
Monitor Multi-Channel Mixes
You can monitor any submix through your headphones. If you have more than one microphone connected to Arena, monitoring is only available on Headset 1, and the microphone on the far left will default to Headset 1.
If you need to monitor a specific submix, select it from the Headphone Monitor drop-down list in the bottom left corner of the Arena home screen. This will allow you to check any submixes during the stream, and/or listen to them while you're setting them up.
If you need to temporarily block the sound output during monitoring, you can touch the earphone icon in the lower left corner to mute and resume monitoring.


Use External Monitoring
You can send an output stream from Arena to an audio output device on your computer. You can use them as separate streaming monitors by connecting them to your speakers or headphones. For example, producers can use it to monitor the output or to provide it to the speakers of the audience. If you're using a device that doesn't have a built-in headphone output, you can also use it as a headphone output.
You can use the drop-down list in the bottom right corner of the main Arena window to select the specific audio device to which you want to send the monitor output.
Please note that it is not possible to select the virtual output devices available in Arena. Usually, it's your computer's built-in headphone output, or other audio interfaces connected to your computer.
If you need to temporarily block the sound output, you can click the speaker icon on the left side of the output device selection box to mute and restore the output.
User Guide & Support
Arena is a powerful virtual mixing solution for streaming and gaming that allows you to control all your audio in one intuitive software interface, with flexible routing options, sub-mixing, professional audio processing, a fast mute table, and more.
Learn everything you need to know about how to use Arena here.

USING THE SOUND PADS

Use Sound Pads
Sound pads can be used to trigger sound manipulations to add fun and excitement to the stream.
Like other channels, the sound input channel has faders that adjust the sound output level. You can use this slider to adjust the level of sound playback. You can also set different levels for the sounds in the submix (see the "Submix" section above).
Sound Pads
When a sound pad has a sound loaded onto it, it will have the ‘sound’ icon showing, with the name of the pad or sound underneath.
Clicking on the pad will play the sound. When the pad is playing, a countdown timer will show on the pad, to indicate how long the sound will play for.
There are three playback methods for each sound - 1-shot, Toggle, Hold, and you can freely choose the playback mode according to your needs


Pad Pages
You can configure multiple pages of sound, and switch between pages using the pad switch buttons underneath the sound pads.
Up to 8 pages can be configured, giving up to 64 sound actions.
When a page of sound is full, you can continue to load new sounds on the new page until all the pages are used up.
CONFIGURING A SOUND FROM PADS
Loading Sounds on the Pads
To load a new sound onto the pad, right-click on the pad you want to add a sound to, You can add a sound either by dragging the sound file you want to add to the pad onto the ‘drag and drop’ icon from the file manager, or you can browse to the file by clicking on the ‘choose file’ option.
Files in either MP3、SWF or WAV format are supported.
When a new sound is added to the pad, the pad will be renamed the name of the sound file. You can further edit the name or color if needed;


Sound Playback Modes
You can alter the playback mode for the pad by clicking on leftmost icon at the bottom of the sound pad configuration meu. Clicking this icon will cycle through the available playback modes.
There are three playback modes for the pad:
1. 1-Shot
Clicking on Sound will start playing until the playback ends, and clicking again will start playing from the beginning
2. Switch
In this mode, clicking on Sound will start playing, and clicking on it again will stop playing.
3. Hold
In this mode, playback will start when the mouse presses Sound, and will stop playing when the mouse button is released.
Looping Sound Playback
If looping is activated, the sound loaded on the sound pad will loop continuously when the sound pad is activated. This allows for continuous playback of beats, atmospheres and other loops.
Note that "1-shot" is usually played once, so loop mode will not take effect
To activate loop mode, click on the ‘loop’ icon in the centre at the bottom on the pad configuration menu.


Replay Mode for Sound Pads
There are two playback states in the replay mode.
1. Replay
In this mode, the pad will play from the start of the sound start position each time it is activated.
2. Continue
In this mode, the pad will continue playback from the point reached when it was stopped.
Note that continue mode is not available with the ‘1-shot’ playback mode. see above for more details.
To change the replay type mode, click on the ‘replay’ icon on the right at the bottom of the pad configuration menu.
MICROPHONE FIRMWARE UPDATE
Firmware Upgrades
When the microphone is plugged in, Arena will check to ensure that the microphone can be updated to the latest firmware promptly.
When there is a new upgrade, we will alert you in the options menu of Arena, at this time you can open the microphone upgrade window by clicking on the options menu and clicking the button to upgrade.
When upgrading, please make sure that the microphone is out of the connection state, if it is disconnected abnormally, the upgrade will be interrupted and your microphone cannot be used normally.
If you encounter an abnormal upgrade, you can click to upgrade again or seek after-sales help.
